I meant to post this earlier, so people would have time to acquire the ingredients and whip up this delightful dish for tomorrow's Independence Day festivities. Because it's so easy and delicious, and screams summer. In fact, if you're willing to get up early and run to the store, you can get this made in plenty of time for your afternoon barbecues. As long as you have four hours between the time you finish assembling and the time you plan to eat, you're golden.
We always considered this a family recipe, but a few months back we were rifling through my nana's old recipe box and discovered a recipe for ORANGE sponge clipped from a newspaper. Granted, said newspaper was likely from the thirties or forties. Maybe the fifties if we're feeling generous. But I think it's safe to say that this has now become a family secret.
And I'm sharing it with all the interwebz.
So the original recipe called for orange flavored gelatin, and we use lemon. You could use any citrus flavor you like, really, but the lemon is particularly refreshing. Your barbecue guests will rave and ask for the recipe, just like everybody at our choir picnic last week.
Lemon Sponge
Ingredients
- 1 box lemon Jello (or whatever brand you prefer)
- 1 cup boiling water
- 1/2 cup granulated sugar
- juice and zest of one fresh lemon
- 1 can evaporated milk
- 1/2 box vanilla wafers, finely crushed
Method
In a small bowl, combine Jello, boiling water, sugar, and lemon juice and zest. Mix well until the sugar and jello have dissolved. The refrigerate for about 45 minutes.
Pour the evaporated milk into the largest mixing bowl that goes with your stand mixer (you can do this with a hand mixer but a stand mixer works way better). Place the bowl into the freezer for 45 minutes, until the evaporated milk starts to crystallize.
While you're waiting for the milk to crystallize, dump the vanilla wafers into a gallon zipper top bag and crush into fine crumbs. In past years, we've been successful with rolling pins and large spoons. The flat side of a meat tenderizer does the trick as well. Just don't get too gung-ho, or you'll pop a few holes in the bag and wind up with crumbs all over your counter. I suppose you could also do this step in a food processor, especially if you want superfine crumbs. But what fun is that?
Fit your mixer with the whisk attachment and beat the evaporated milk on high until it is light and frothy. The longer you beat it, the better it will be.
While the milk is frothing, generously butter the bottom and sides of your serving dish. You can use a large serving bowl about the same size as your big mixing bowl, but for optimum crumb-to-sponge ratio a rectangular baking dish works best. I just used a disposable cake pan for this round, because I didn't want to wait around for my dish at the end of the picnic. But usually, I use my prettiest glass cake pan.
After buttering the serving dish or pan, evenly press about 3/4 of the cookie crumbs into the bottom and up the sides of the dish. You probably won't get many crumbs to stick to the sides unless you have them crushed into extremely fine cookie dust, but don't worry about it. Set the remaining cookie crumbs aside for now.
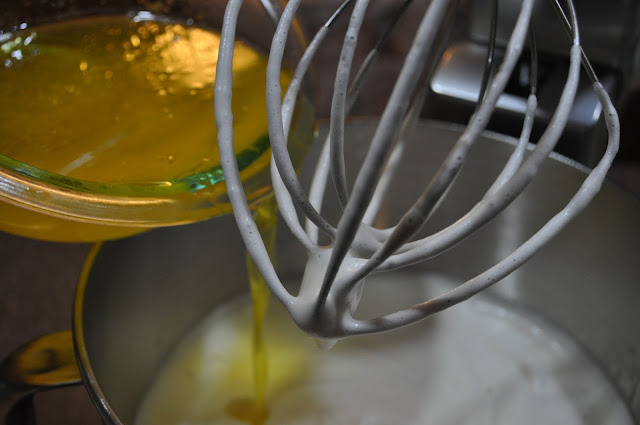
Back at the mixer, carefully pour the lemon mixture into the evaporated milk. You may want to switch the mixer off, to avoid splashing. Then beat again on a high speed for about two minutes to distribute the lemon throughout. Sometimes you have to scrape the sides with a spatula and beat the mixture for about ten seconds more.
Pour the mixture into your serving dish and spread evenly to the edges. Top with the remaining cookie crumbs.
Cover with plastic wrap (or the lid of your disposable pan if it has one) and refrigerate for at least four hours to set. Seriously. You need to give it four hours.
You'll know you've done it right because when you scoop some out, it will make a sort of scruch sound.
Have a pencil and note paper on hand so you're prepared when people ask for the recipe.


No comments:
Post a Comment